Before jumping into code, you need to understand what is IaaC i.e. Infrastructure as a Code and what are the advantages of using it.
According to Wikipedia, Infrastructure as code is the process of managing and provisioning computer data centers through machine-readable definition files, rather than physical hardware configuration or interactive configuration tools. Read more...
Advantages of IaaC 🔥
- Speed and simplicity: by running the simple command you can create/destroy the whole infrastructure.
- Configuration consistency: Every time created infra. will be the same. (if code is same)
- Minimization of risk: Humans tends to do a mistake but computers not.
- Increased efficiency: No need to create infra manually every time.
So Terraform is a tool that is quite cool. In this blog post, we will create an EC2 machine that will reside in the default VPC and you can access it using SSH.
Spin EC2 Instance
According to Wikipedia, Amazon Elastic Compute Cloud (EC2) is a part of Amazon.com's cloud-computing platform, Amazon Web Services (AWS), that allows users to rent virtual computers on which to run their own computer applications.
you can find all code in this post https://github.com/lets-learn-it/terraform-learning/tree/aws/00-ec2-instance
We will be using default VPC with CIDR 172.31.0.0/16 with 3 subnets. As you can see, we are using the default route table and Internet gateway for sake of simplicity. We are putting our EC2 instance in the security group which allows SSH inbound connections and all outbound connections.
Add Provider block
Provider block tells terraform which kind of infrastructure we want to create. In our example, we are creating AWS. In terraform block, we can give the plugin version we want to use.
provider "aws" {
  # I am using Mumbai region
  region = "ap-south-1"
}

terraform {
  required_providers {
    aws = {
      source  = "hashicorp/aws"
      version = "~> 3.37.0"
    }
  }
}
Create key 🗝
To connect EC2 instances using SSH, we need ssh keys. Let's create these first. Run the following command, and type passphrase when it asks
ssh-keygen -t rsa -f ~/.ssh/ec2 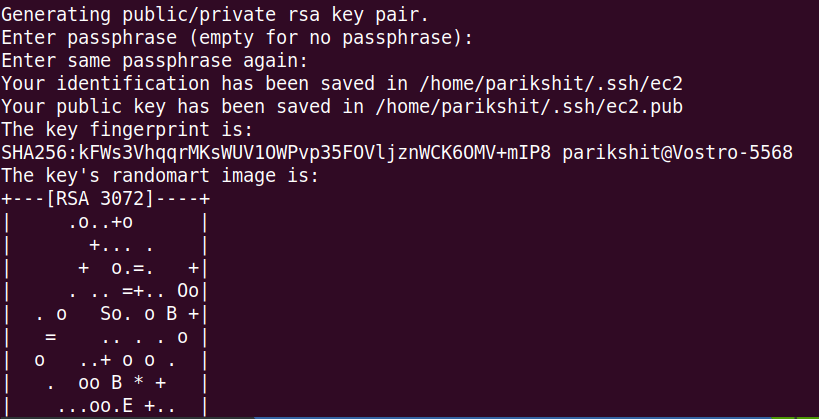
resource "aws_key_pair" "key" {
  key_name   = "parikshits_key"
  public_key = file("~/.ssh/ec2.pub")
}
Use default VPC
AWS creates default VPC in each region. For this example, we will use default VPC.
resource "aws_default_vpc" "default_vpc" {

}
Create Security Group 🛡
We want to connect to our EC2 machine using SSH, So we need to allow ssh traffic to our machine from anywhere.
resource "aws_security_group" "allow_ssh" {
  name        = "allow_ssh"
  description = "Allow ssh inbound traffic"

  # using default VPC
  vpc_id      = aws_default_vpc.default_vpc.id

  ingress {
    description = "TLS from VPC"

    # we should allow incoming and outoging
    # TCP packets
    from_port   = 22
    to_port     = 22
    protocol    = "tcp"

    # allow all traffic
    cidr_blocks = ["0.0.0.0/0"]
  }

  tags = {
    Name = "allow_ssh"
  }
}
Create EC2 Instance
We will create t2.micro instance (free tier) in this example.
resource "aws_instance" "my_ec2" {
  ami             = var.ami_id
  instance_type   = "t2.micro"

  # refering key which we created earlier
  key_name        = aws_key_pair.key.key_name

  # refering security group created earlier
  security_groups = [aws_security_group.allow_ssh.name]

  tags = var.tags
}
Add variables
We are using var.xxx, which are variables used in our code. We need to define these variables.
variable "ami_id" {
  description = "this is ubuntu ami id"

  # I am using amazon linux image
  default     = "ami-0a23ccb2cdd9286bb"
}

variable "tags" {
  type = map(string)
  default = {
    "name" = "parikshit's ec2"
  }
}
Output useful info
Terraform can output attributes of resources i.e. public_ip of EC2 instance. We need public IP to connect instances using SSH.
output "arn" {
  value = aws_instance.my_ec2.arn
}

output "public_ip" {
  value = aws_instance.my_ec2.public_ip
}
Create Infrastructure 🛠
Initialize Terraform Plugin
We need to fetch terraform's AWS plugin before we start to create infrastructure. you can initialize the plugin using the following command,
terraform init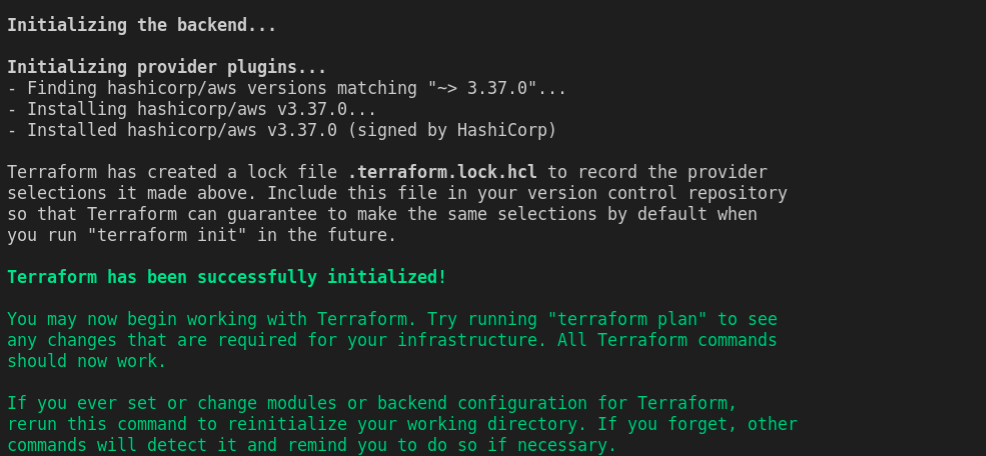
Check Plan
before creating AWS EC2, we can check the plan of infrastructure which can tell what resources terraform will create. To check plan, run following command,
terraform planTerraform used the selected providers to generate the following execution plan. Resource actions are indicated with the following symbols: + create Terraform will perform the following actions: # aws_default_vpc.default_vpc will be created + resource "aws_default_vpc" "default_vpc" { + arn = (known after apply) + assign_generated_ipv6_cidr_block = (known after apply) + cidr_block = (known after apply) + default_network_acl_id = (known after apply) + default_route_table_id = (known after apply) + default_security_group_id = (known after apply) + dhcp_options_id = (known after apply) + enable_classiclink = (known after apply) + enable_classiclink_dns_support = (known after apply) + enable_dns_hostnames = (known after apply) + enable_dns_support = true + id = (known after apply) + instance_tenancy = (known after apply) + ipv6_association_id = (known after apply) + ipv6_cidr_block = (known after apply) + main_route_table_id = (known after apply) + owner_id = (known after apply) + tags_all = (known after apply) } # aws_instance.my_ec2 will be created + resource "aws_instance" "my_ec2" { + ami = "ami-0a23ccb2cdd9286bb" + arn = (known after apply) + associate_public_ip_address = (known after apply) + availability_zone = (known after apply) + cpu_core_count = (known after apply) + cpu_threads_per_core = (known after apply) + get_password_data = false + host_id = (known after apply) + id = (known after apply) + instance_state = (known after apply) + instance_type = "t2.micro" + ipv6_address_count = (known after apply) + ipv6_addresses = (known after apply) + key_name = "parikshits_key" + outpost_arn = (known after apply) + password_data = (known after apply) + placement_group = (known after apply) + primary_network_interface_id = (known after apply) + private_dns = (known after apply) + private_ip = (known after apply) + public_dns = (known after apply) + public_ip = (known after apply) + secondary_private_ips = (known after apply) + security_groups = [ + "allow_ssh", ] + source_dest_check = true + subnet_id = (known after apply) + tags = { + "name" = "parikshit's ec2" } + tenancy = (known after apply) + vpc_security_group_ids = (known after apply) + ebs_block_device { + delete_on_termination = (known after apply) + device_name = (known after apply) + encrypted = (known after apply) + iops = (known after apply) + kms_key_id = (known after apply) + snapshot_id = (known after apply) + tags = (known after apply) + throughput = (known after apply) + volume_id = (known after apply) + volume_size = (known after apply) + volume_type = (known after apply) } + enclave_options { + enabled = (known after apply) } + ephemeral_block_device { + device_name = (known after apply) + no_device = (known after apply) + virtual_name = (known after apply) } + metadata_options { + http_endpoint = (known after apply) + http_put_response_hop_limit = (known after apply) + http_tokens = (known after apply) } + network_interface { + delete_on_termination = (known after apply) + device_index = (known after apply) + network_interface_id = (known after apply) } + root_block_device { + delete_on_termination = (known after apply) + device_name = (known after apply) + encrypted = (known after apply) + iops = (known after apply) + kms_key_id = (known after apply) + tags = (known after apply) + throughput = (known after apply) + volume_id = (known after apply) + volume_size = (known after apply) + volume_type = (known after apply) } } # aws_key_pair.key will be created + resource "aws_key_pair" "key" { + arn = (known after apply) + fingerprint = (known after apply) + id = (known after apply) + key_name = "parikshits_key" + key_pair_id = (known after apply) + public_key = "ssh-rsa" } # aws_security_group.allow_ssh will be created + resource "aws_security_group" "allow_ssh" { + arn = (known after apply) + description = "Allow ssh inbound traffic" + egress = (known after apply) + id = (known after apply) + ingress = [ + { + cidr_blocks = [ + "0.0.0.0/0", ] + description = "TLS from VPC" + from_port = 22 + ipv6_cidr_blocks = [] + prefix_list_ids = [] + protocol = "tcp" + security_groups = [] + self = false + to_port = 22 }, ] + name = "allow_ssh" + name_prefix = (known after apply) + owner_id = (known after apply) + revoke_rules_on_delete = false + tags = { + "Name" = "allow_ssh" } + vpc_id = (known after apply) } Plan: 4 to add, 0 to change, 0 to destroy. Changes to Outputs: + arn = (known after apply) + public_ip = (known after apply) ───────────────────────────────────────────────────────────────────── Note: You didn't use the -out option to save this plan, so Terraform can't guarantee to take exactly these actions if you run "terraform apply" now.
Create Infra
Finally, we can create infrastructure. but make sure you are logged in to AWS using the cmd line. Run the following command to create our AWS EC2 machine. When it ask Enter the value: , give it yes.
terraform apply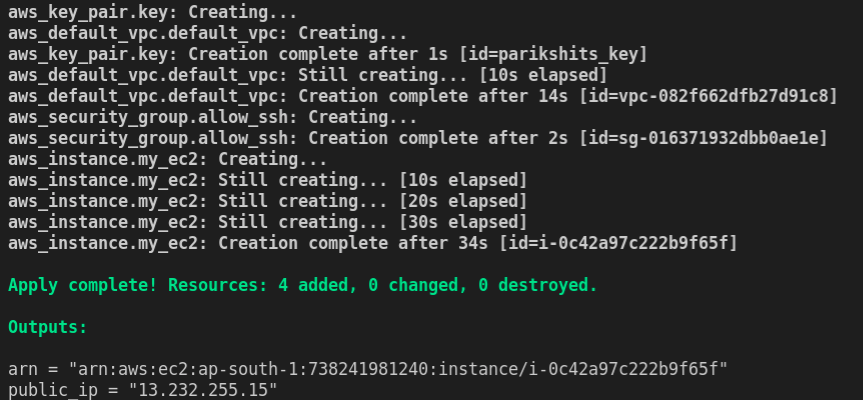
you will get public IP as I got 13.232.255.15. We will connect to the machine using SSH.
ssh -i ~/.ssh/ec2 ec2-user@13.232.255.15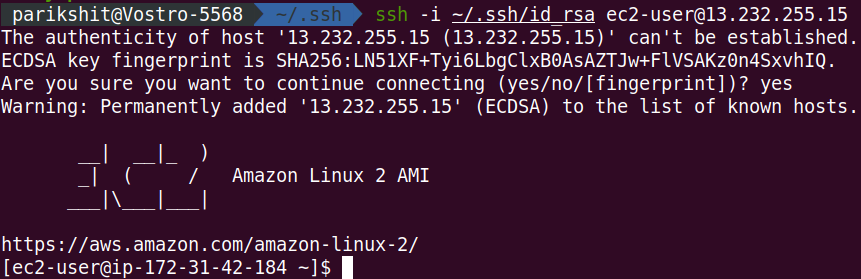
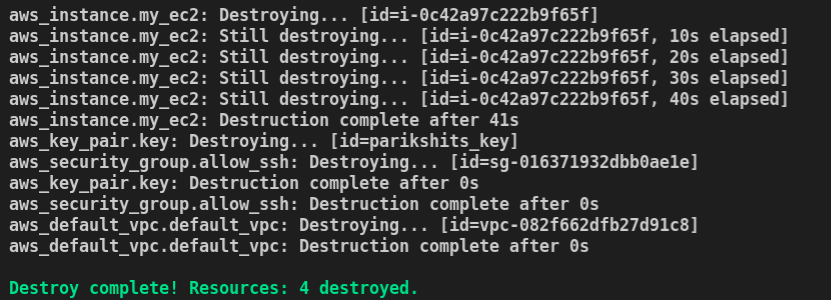
Destroy Infra
After using AWS EC2, we want to destroy it to save money. Terraform can do that with a single command. It will ask you again for confirmation, give it yes
terraform destroy